How To Get a Email Verified Badge
Email Certificates?
Yes, these are certificate which verifies that you are using a certain type of encryption (S/MIME) when sending mails. This is rare because it’s not really necessary plus it’s a pain to set it up correctly.
Getting Email Certificate
Go to Actalis's websiteEnter the email you want to verify, click on “send verification email” and enter the OTP from the email.
*Note: sometimes the email goes to the spam folder so make sure you check that as well
Then check all the terms and condition and click on “Submit Request”.
On the next page it will show you a password, Save this password or better just print this page to a PDF file since this password will NOT be shown to you ever again and there is no way to get this page back.
Next download the .zip file they sent on your email and extract the certificate which is in .pfx file.
Installing Certificates on your machine
*You don’t have to perform this step on Linux machines.
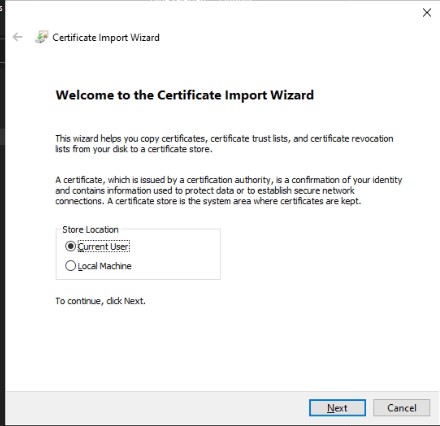
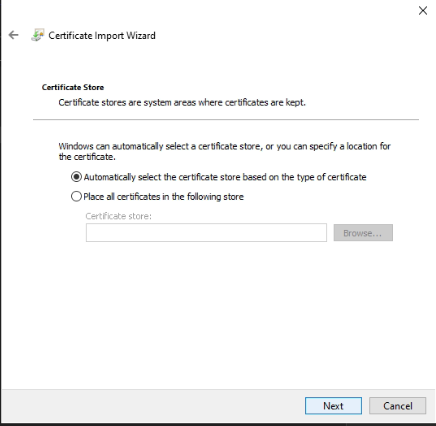
Open the .pfx file and go through the prompts:

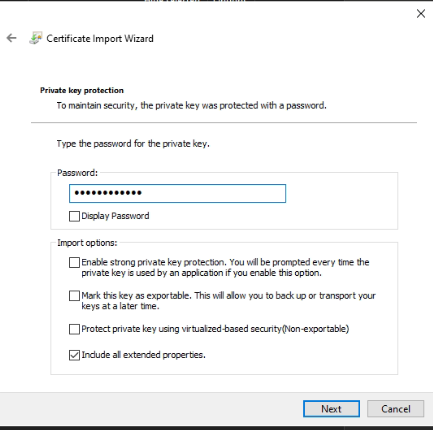
Here you have to enter the password which was given before (the one your printed).
Export Intermediate Certificate
This is an important step as some email clients require you to have intermediate certificate as well like Apple Mail. For other common clients like Outlook, you do NOT need this certificate so you can skip this step.
-
Search for “Manage User Certificate” on Windows
-
Under Personal -> Certificates
-
Double click on your email’s certificate and go to “Certificate Path”
-
Double click on the middle certificate and go to “details” tab
-
Click on “Copy to file” and go with default options in the prompt
-
Give it a name, usually “Actalis Client Authentication CA G3” as that is the default name.
Installing Certificates on Email Clients
*YOU CANNOT USE GMAIL WEB OR ANDROID APP TO SEND EMAILS WITH A S/MIME CERTIFICATE
Outlook
-
Go to File -> Options -> Trust Center -> Trust Center Settings -> Email Security -> Settings
-
Click on “new” and give it a name
-
“Choose” the certificate
-
Change the hash algorithm to “SHA256”
-
Check “Send clear text signed message…
Thunderbird
-
Go to security settings: Hamburger button (☰) -> Settings -> Privacy & Security
-
Scroll down to “Certificates” and click on “Manage Certificates”
-
Import the .pfx file and enter the password shown before.
-
Now, go to account security settings: Hamburger button -> Account Settings -> End-To-End Encryption
-
“Select” the certificate and click “OK” & “Yes” on the next dialogue box
Apple Mail
-
Mail yourself both certificate, Personal and Intermediate.
-
Open the mail and open the Personal Certificate by clicking on it then choose to install it on the Iphone/Ipad.
-
Go to the settings app and there will be a new menu named “Profile Downloaded” then click “Install” then click “install” and then “Install” again one last time.
-
Now it will ask for that password from before.
-
Now go back to the email and click on the Intermediate Certificate and repeat the steps.
Now enable sending emails with this certificate by:
-
Settings -> Mail -> Accounts -> [Your Email] -> Account -> Advanced
-
Scroll down to “S/MIME” and click on “Sign” and toggle the switch. You might have to select a certificate if you have multiple certificates for one email address.
Android
You can send the .pfx file through email and install it by opening the file and entering the password.
You have to search for intrustions for individually because Gmail app or web doesn’t support sending emails with S/MIME protocol.
Remember to send test email(s) to check if the email signing if working correctly and as intended.
Video Resource
that’s it ✌🏽